Today, I’m excited to share one of our family favourite homemade dishes: Kare Udon. Actually, it’s my husband’s fave. I’ve been really into making things from scratch lately—there’s just something satisfying about it, don’t you think? One of my recent kitchen projects has been perfecting my own curry roux.
Sure, store-bought curry roux cubes are quick and tasty, but making your own from scratch is a whole different experience. No additives, no preservatives—just fresh, pure flavour right from your kitchen. There’s something special about being in control of every ingredient, and the smell of the spices blending together is just incredible. It’s a bit of a labour of love, but totally worth it for that rich, comforting curry broth.
The Inspiration Behind Homemade Kare Udon
The idea for my homemade Kare Udon came from my husband’s love for Japanese food and curry. I’ve always admired how much care goes into Japanese cooking, especially their comforting, rich curries. At first, I used the store-bought curry roux blocks—they’re quick, tasty, and super convenient. But once I started making it from scratch? Total game changer. I get to control all the flavours and ingredients, and honestly, it just tastes just as good.
It took some trial and error to get the roux right. I’ve played around with different spice combos and techniques until it really matched what we love. What I enjoy most about making it at home is how fresh and customizable it is—no additives, just clean, rich flavour I can tweak any way I like.
Along the way, I picked up a few little tips, like toasting spices to bring out their depth, and adding a hint of sweetness with things like apple or even a bit of dark chocolate. Those small touches really round it out.
So here’s how I make Kare Udon from scratch, starting with that hearty curry roux. It’s become a cozy family favourite around here—and a little project that’s as satisfying to make as it is to eat.
The Art of Crafting Homemade Curry Roux
Making homemade curry roux is a fun culinary adventure that requires time, patience, and a bit of creativity.
Did you know that some Japanese chefs add chocolate to their curry roux to boost flavour. Dark chocolate brings a rich, slightly sweet taste that complements the spices. It adds depth and balances out any bitterness, creating a deliciously unique curry. It’s a creative twist that showcases the versatility of Japanese cuisine.
Adding real chocolate, especially dark chocolate with a high cocoa content, can bring a subtle richness and depth to the curry roux. It adds a velvety texture and a hint of sweetness that pairs well with the spices in the curry, helping to balance out any acidity or bitterness. Just make sure the chocolate is fully melted and blended into the roux to avoid any lumps.


Japanese S&B curry powder – I love using this because it has a balanced blend of spices that make the curry so flavourful. It’s known for its consistent quality, and it’s easy to use in many different dishes.
Ingredients:
- 2 tablespoons curry powder
- 1 teaspoon garam masala
- 4 teaspoons unsalted butter
- 1/4 cup all-purpose flour
- 1 teaspoon cornstarch
- 1/2-1 tablespoon 80% dark chocolate (optional)
Here’s a glimpse into my process:
Ingredients and Preparation: To start, gather your ingredients: curry powder, garam masala, cornstarch, flour, butter, and now, chocolate for a unique twist. I prefer homemade roux over prepackaged options for its freshness and ability to customize flavours.
2. Melt and Mix: In a saucepan over medium heat, melt butter until it begins to sizzle. Add flour and cornstarch, whisking continuously to create a smooth paste. Then, sprinkle in curry powder, garam masala, and dark cocoa powder/chocolate, infusing the roux with aromatic spices and a hint of chocolatey richness.
3. Toast and Transform: Allow the roux to cook for a few minutes, stirring constantly, until it transforms into a fragrant, golden mixture. This toasting process is crucial for enhancing the depth of flavour and ensuring the spices are fully incorporated.
4. Incorporate Into Kare Udon: Now your homemade curry roux is ready!
The Taste Test
As I whip up my homemade Kare Udon, my kitchen fills with the inviting smell of curry and spices mingling together. It’s comforting and exciting at the same time, making me eager to dive into the finished dish.


The flavours were incredible—they’re savoury with just the right amount of spiciness. There’s something so satisfying about knowing I made every part of it from scratch, from grinding the spices to stirring up the curry roux.
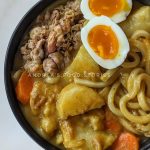
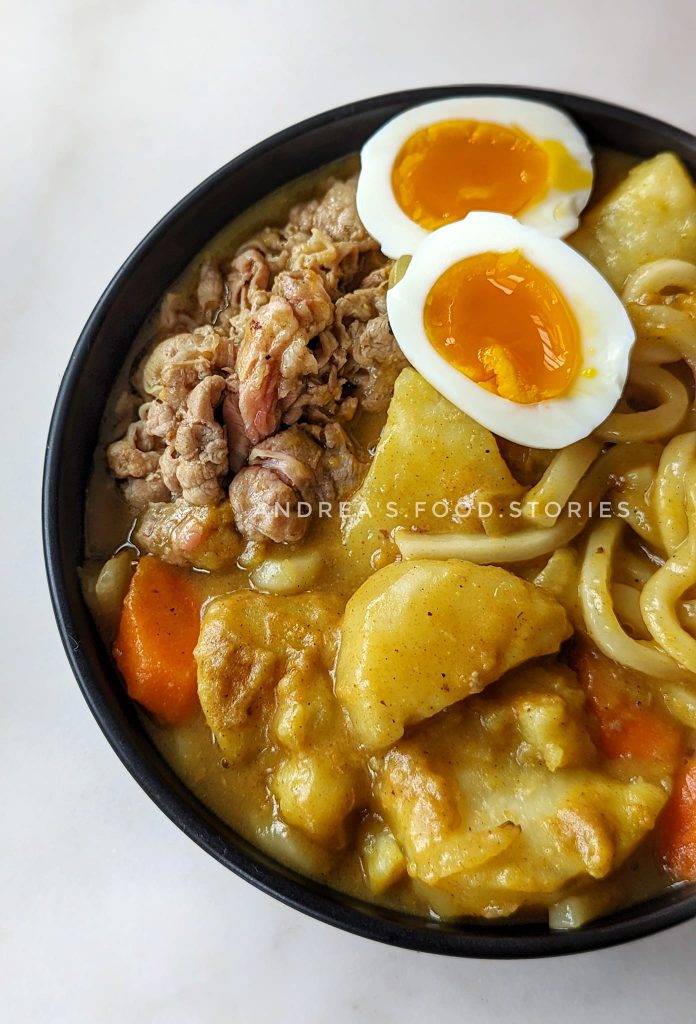
Curry Udon (Kare Udon)
Ingredients
- 1 medium onion, sliced
- The amount of beef brisket or any other protein you prefer
- 1 medium carrot, sliced
- 1 medium potato, cut into chunks
- 3 cloves garlic, minced
- 8 g instant dashi
- 5 cups water
- 2 tsp soy sauce
- 2 frozen udon noodles
- 70 g curry roux (I used 2 blocks of the roux I made)
- additional veggies of your choice (optional)
- 1-2 soft-boiled eggs (optional)
Instructions
- Begin by briefly cooking the hot pot beef briskets in a pot until they are slightly cooked. Transfer the partially cooked meat to a bowl and set aside.
- In the same pot, sauté the sliced onions and minced garlic until they become transparent and aromatic.
- Add the potato chunks and sliced carrots to the pot and continue to sauté for about 5 minutes, allowing the vegetables to soften slightly.
- Pour in the dashi mix (instant dashi mixed with 5 cups of water) and bring the mixture to a gentle boil over medium heat.
- Once the mixture starts to bubble slightly, add the curry roux blocks to the pot. Stir continuously as the roux melts into the broth, ensuring it is evenly incorporated.
- Let the mixture simmer until the curry roux fully dissolves and the broth thickens slightly. If you prefer a thinner consistency, feel free to add more broth.
- Add the frozen udon noodles to the pot, allowing them to cook in the flavourful broth and absorb the curry flavours. Keep stirring to loosen them up.
- Once the udon noodles are cooked through, add the partially cooked beef briskets back into the pot. Stir gently to combine all the ingredients. Taste and add soy sauce if you need to.
- Serve the Curry Udon hot, garnished with any additional veggies or toppings of your choice. Enjoy your homemade Curry Udon straight from the pot to the bowl!